How To | Replace KS118 Low Frequency Transducer
Learn how to replace a KS118 low frequency transducer and get the powerful sound you need.
Procedure
If determined necessary, use this document as a guide for replacing the Low Frequency (LF) Transducer on the KS118.
Tools
- Manual Screwdriver or Electric Screwdriver with Philips bit
- Putty knife
Replacement Parts
- QSC Part Number XD-000110-01 = Woofer, 18” Speaker
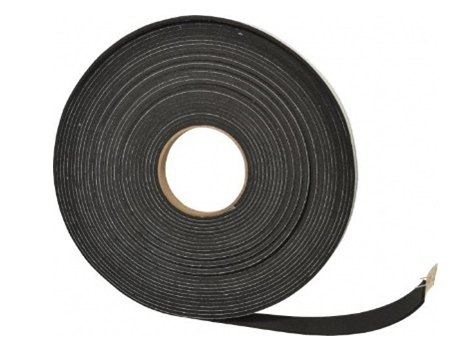
- Gasket, 3/4” x 1/8” Closed Cell Foam, Adhesive Tape (Not supplied by QSC)
Grille Removal
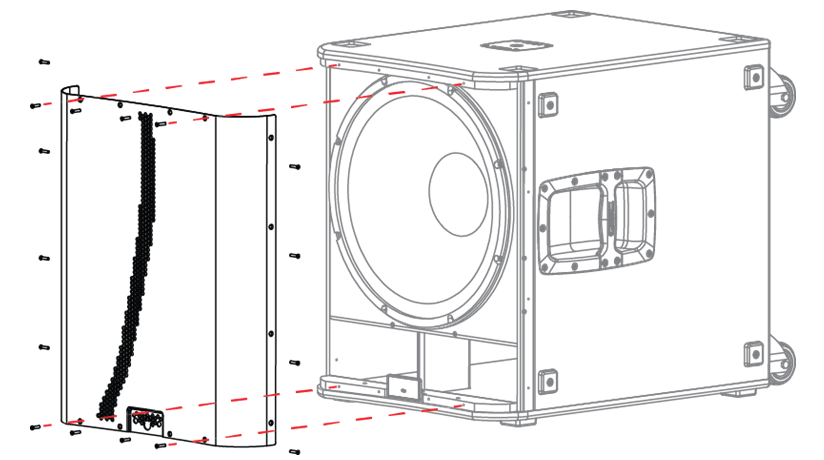
- Remove 16 wood screws (QSC Part Number SC-000070-00) that secure the grille assembly to the subwoofer enclosure.
- Remove grille assembly from the enclosure
LF Transducer Removal
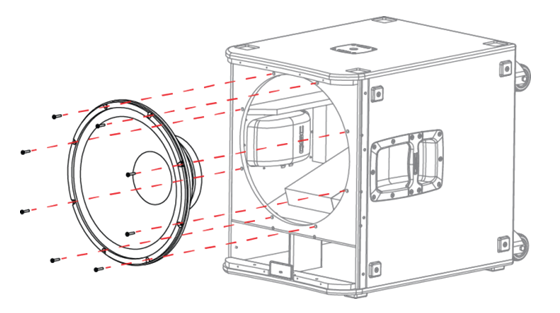
- Remove 8 machine screws (QSC Part Number SC-000325-00) that secure the LF transducer to the subwoofer enclosure. See LF Transducer.
- Carefully lift the transducer out of the enclosure. Gently pry on any edge/bottom frame of the LF transducer by using a putty or butter knife.
- Mark the orientation of the transducer’s terminals in the enclosure. See LF Transducer terminal location (view from front side) .
- Disconnect the FASTON connectors from the + and - terminals on the transducer. The tab must be pressed in to release the connectors. See FASTON connectors.
LF Transducer Installation
- Install the gasket around the bottom perimeter of the LF transducer frame.
- Install the transducer into the enclosure and align the holes in the enclosure and transducer basket.
- Connect the green (+) and green/black (-) wires from the wiring harness to the front transducer’s terminals. See Wire and color connections.
Wire and color connections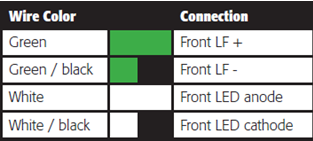
- Verify the correct orientation of the transducer in the enclosure. See LF Transducer terminal location (view from front side).
LF Transducer terminal location (view from front side) 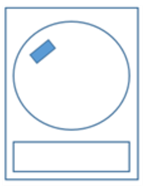
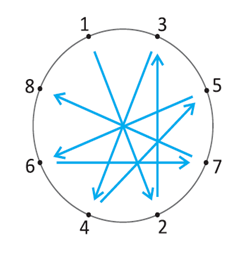
- Fasten 8 machine screws (QSC Part Number SC-000325-00) in a crisscross pattern to secure the LF transducer to the enclosure. Torque to 46 KGF-CM (40 IN-LBS). See Crisscross tightening pattern.
Crisscross tightening pattern